


£160 for a set of lights - are Blinkers the ultimate safety accessory, or an expensive gadget?
Cycling at night in a built-up area is a worry. Once you get past the close passes by cars, there's the worry that pedestrians, other cyclists and petrol-powered friends miss your turning signals - and that's before we deal with the issue of braking.
Which is why the Blinker Smart lighting system is so attractive.
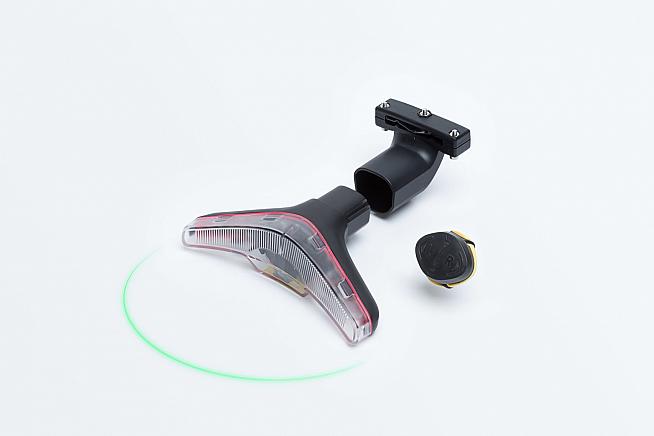
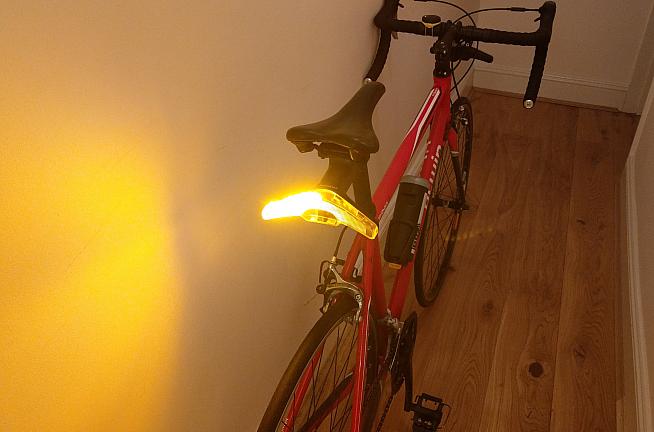
Recently funded by a successful Indiegogo campaign, Blinkers offer front and rear yellow turn signals, wirelessly operated from the handlebars.
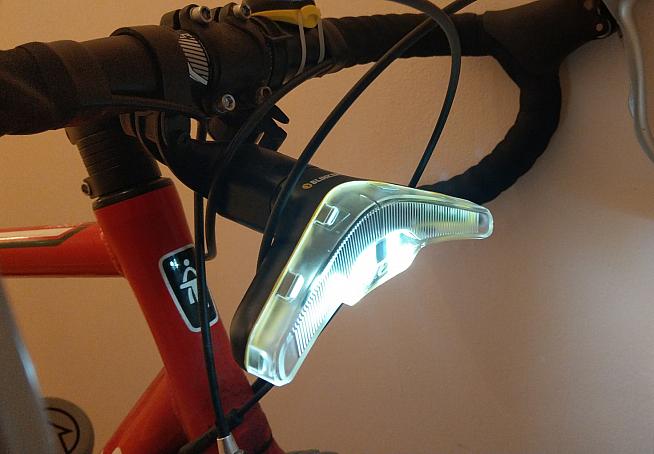
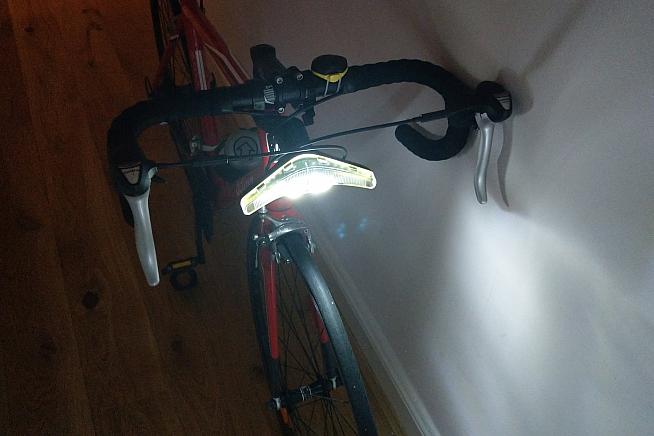
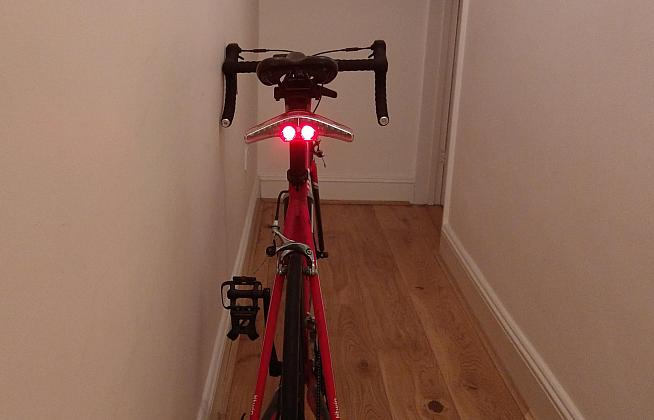
The 200-lumen front light and 100-lumen rear units offer variable lighting to make sure you stay visible, and even an automated brake light - ramping up the rear light's intensity when you apply pressure to the levers.
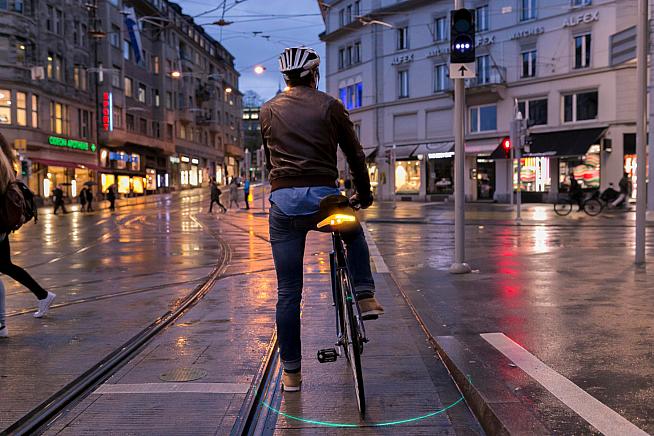
And if that's not enough, there's even a version with laser on the back, throwing a green arc around the back of your bike to make other road users more aware of the space you need.
But they don't come cheap - costing £160 for a set with a laser included and £150 for one without. Is that outlay worth the cost?
I took a set out on my newly dark commute to find out.
Fitting the lights
I normally ride with rechargeable Lezyne Microdrives on the front and back, with cheaper, less bright Femtos in my draw at work just in case.
They attach to my bars and seat post with - effectively - a big rubber band and are as secure as you like. They're also plenty bright enough for city riding and I've even taken them out in the countryside overnight during an ill-fated attempt at riding from London to Paris in 24 hours unsupported.
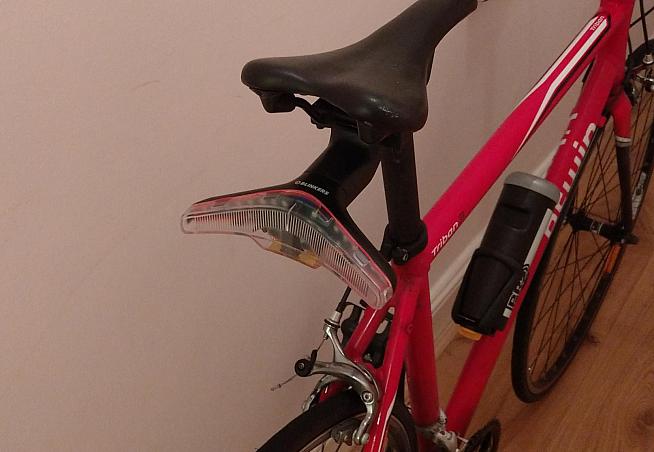
The Blinkers are a bit trickier to fit. The rear mount clamps to the saddle rails - involving a rubber dampening sheet I re-fitted three times before realising it was the wrong one, and some awkward Alan key work, while the front mount is attached to your handlebars. in the same way.
A word of warning: if you're running oddly shaped aero bars or have oval carbon saddle rails, the mounts may not fit neatly. But for my standard round bars and rails, there was no issue other than it being a little fiddly to get the initial set up right.
Once the mounts are in place, the lights themselves attach to them with a surprisingly powerful magnet.
Dropping them into the socket also activates them, and they light up to tell you how much power is left using the indicators. Clever.
The control unit, used to signal turns, fits to the bars using the traditional "big rubber band" method you're probably familiar with.
Set up
This is relatively straightforward. First you'll need to charge the lights using the rather lovely supplied micro-USB cable. It's the same sort you'd use for a Kindle or older Android phone - you might well have a few around - but it's also braided red material that reeks of quality.
Then follow the instructions to pair the controller with the lights.
I struggled a little here at first. I could get the controller to fully work with the rear indicators, laser and light, but ran into issues making the front indicators work.
I started again, following the instruction video this time rather than the printed manual to make sure I wasn't getting anything wrong, and all was well.
Done right, set up takes less than 5 minutes.
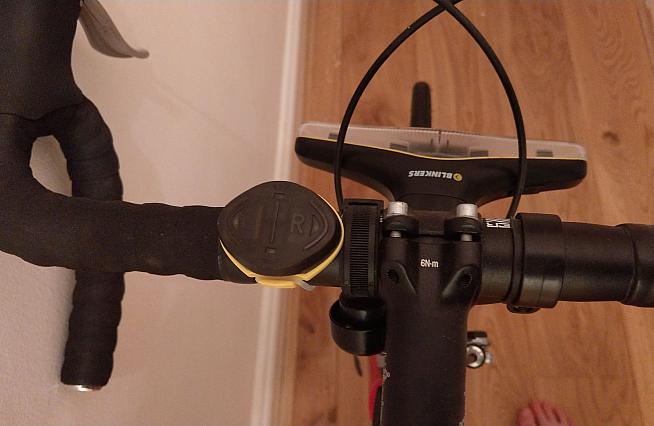
The controls are intuitive - press left to indicate left, right to indicate right. Press down (towards the back of the bike) to turn on and cycle through the rear light's modes, and up (towards the front of the bike) to do the same for the front light.
You activate the rear laser with a long press down - and turn it off the same way.
The brake light is automatic when it senses deceleration. I spent a good few minutes with the lights in my hand 'testing' this and watching it get brighter as I whooshed it through the air. I defy you not to.
On the road
I took my first ride with the lights thanks to brutal 6am start to a shift in November.
My commute's a little over an hour, riding down from Crystal Palace, up to London Bridge, then across across town to the east. It covers main roads, hills, back roads, cycle super-highways, one multi-lane roundabout and a lot of junctions.
The good news was at 5am it was dry and the roads mostly empty for the start.
A cut-through to get to the main road told me that what I thought was a slightly under-powered front light was plenty to see by in the darkest urban streets at a moderate pace.
In fact, what I'd just experienced was the "smart light" effect for the first time - where the lights increase in brightness when the ambient light drops.
It was hard to remember to move my hands to the controller before turning at first - and the manufacturers are keen to emphasise that you still need to signal with your hands - but I got the hang of it in a few minutes.
However, it's not something you can do from the drops, and in a fraught situation or on a descent taking your hand off one of the brakes to indicate feels like your control of the bike is compromised.
Of course, they aren't designed for racing downhill, and by riding a little more circumspectly and braking earlier this really isn't a problem.
Another point to make is that the controller is on one side only. I set it up on my left, so for a right turn the process was: move left hand off brake to start indicator, replace left hand on brake, signal with right hand. Going the other way it was simpler - with just lifting your hand and hitting the controller before signalling.
When pressed, the indicators flash for 12 or so seconds, then automatically switch off. If you want to stop them sooner, you can simply press the control again.
The laser feature is great, but also uses up a lot of power. Blinkers recommend it's on for no more than 10 minutes at a time. Not the most helpful for an hour-long commute through town, but on familiar roads you'll know when you most need it.
If this sounds like grumbling about "bonus" features of the Blinkers, I would say that it is exactly these extra features that should justify Blinkers' premium over standard bicycle lights.
Clearly Blinkers are not designed for a peloton, time trial or crit; they are designed to make you safer and let other road users know what you're doing especially in urban cycling. Being a bit more careful when turning is almost an added benefit here.
And as I've said, the brake light is fully automatic; I have absolutely no complaints about the awesome brake light.
A bump in the road
While grumbles about moving my hands a bit differently when turning are pretty easy to ignore - and once you've got into the habit you won't think about it - something else happened on that first commute that gave me serious pause about the Blinkers.
Coasting on empty roads at about 30km/h (it was downhill) I hit a pothole.
Both lights fell off. Into the middle of the road.
The magnetic attachment, which felt so strong when I was fitting them, didn't handle the short sharp shock or interrupted tarmac.
I pulled over, rested the bike on a lamp post, and wandered back into the middle of the road to collect them. The lights were fine - unhurt by their drop - but it was also 5am and the start of my ride. On a busy road they could easily have been driven over by a car, or caused serious problems for any cyclists following me.
I spent the remaining 45-odd minutes of my ride avoiding every pot hole I could (something we all know is impossible to do when the roads are busy) and using MTB skills to minimise the impact of any bumps I couldn't ride around.
Now, this is pretty easy to fix. A rubber band, a pice of string, a spare shoelace - any number of things can hold the lights in place and prevent a repeat performance.
It's a fix I've used ever since, and they've never come off again - but that also means covering part of the light. It's an unsatisfactory bodge on a premium product and looks, well, awful.
Verdict
The lights are clever - really clever. From adaptive brightness, to motion-sensing brake light, and wirelessly operated front and back indicators, there's a lot of tech packed into Blinkers.
Even the power indicator when you plug them in (either to charge or to their clamps on the bike) is smart. The water-proofing has stood up to road spray and rain well so far, with neither the lights or the controller really noticing it at all.
On the down side, they're also heavy (170g per unit), large, slightly tricky to fit, and you'll need to replace the coin-battery in the remote every six months or so. The rear laser only working for 10 minutes at a time is annoying too.

I hope the problem with them jumping out when hitting a pot hole was a one off - but I've also not ridden them without securing them since. I'd not recommend you do either.
So, after all that, are they worth the price?
If safety is your number one concern, then yes. The extra information they give other road users is something that I've not seen anywhere else.
But that's the only reason I can see for spending £100 more than you would on a good pair of standard lights, that are also smaller, lighter, just as bright, easier to fit and carry about with you off the bike and don't fall off when you hit a pot hole.
Having said all that, I've kept the Blinkers on my bike and can recommend them for commuters. Even if it's with strings attached.
Blinker Laser Set, €199 from www.blinkers.bike
0 Comments